![]()
![]()
![]()
![]()
TIMBERFRAMING
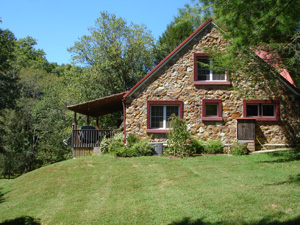
I've done allot of work in the library and in field observation on this topic, but nothing beats practical experience for deep understanding. And deep hurting. Pain that will make you remember the correct posture for hewing. In September 2010, after years of invitations to barn raisings by Jayson Wilson of Just Wood Timberframing (who I met at a demonstration day at Highland Hardware in Atlanta back about 2002), the stars finally aligned and Shannon and I headed up to Brasstown, North Carolina to a beautiful property where he was beginning a barn. He had gathered a small group of enthusiasts for a week-long 'workshop' where he would teach and we would help. The property had an existing stone house and a mature bamboo grove with a creek running through it. The barn would be in a nicely grassed field along the road. We were there for the first night's meet and greet barbecue and the first full day of work, spent preparing two large pine logs which would be the two principal lintels. Jayson already had the holes dug for the post footings. We only had the one day of work, but it was an education in log setting, marking, peeling and hewing. The following photos tell the story. We will return in November to participate in the raising.
.jpg)
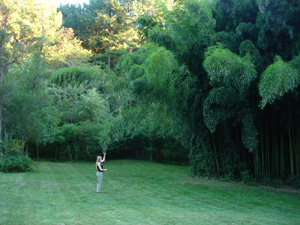
An encouraging sign that we were on the right trail after many back roads and questionable turn-offs. This is the intersection of Old Highway 64 West and Greasy Creek Road. The most striking sight when we got to the property was the bamboo stand at the end of a long nicely mowed field. Shannon for scale.
.jpg)
The Enchanted Broccoli Forest. Next to the Gingerbread House.
.jpg)
.jpg)
Walk through the grove and there was a clearing next to the creek for camping. The creek actually was not greasy.

.jpg)
Did I mention that the bamboo was particularly impressive?
.jpg)
We arrived late in the day, in time to see the two principal beams craned into place and to eat barbecue. The bark peeling is begun with spud and broad ax.
.jpg)
.jpg)
Jayson prepares to roast corn. There were about 15 of us at the opening day meet-and-greet. The food and camaraderie and jam session that ensued was made even more pleasant by the idyllic surroundings. The first of the two logs was de-barked which made an impressive first night's bonfire
.jpg)
.jpg)
The post footings are dug and jigs to set the posts are made. Believe it or not, this is the construction drawing. I had to take off my architect hat and go with the flow.
.jpg)
.jpg)
Bonfire: the morning after. The first operation was determining where the "faces" would be and setting the logs in perfect orientation to establish the first face. This was to be a traditional structure and hand tools would be used throughout, excepting this very first day's work which would permit the use of a crane to set the heaviest logs and a chainsaw to make notches for hewing. A line is snapped for each corner.
.jpg)
Positioning with a Cant Hook and setting with a metal Dog.
.jpg)
.jpg)
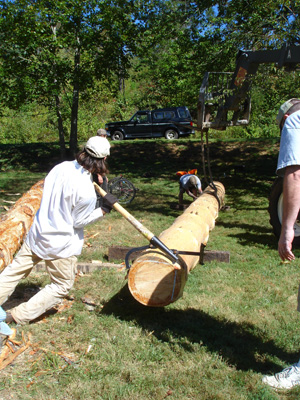
After a chalk line is snapped on each side of the face to be hewn, notches are cut perpendicular to the log at regular intervals to help establish the flat face for the hewing. Cuts are made in 2" pairs about 12" apart. An adz is then used to knock out each 2" portion. Don't forget your shin protection.
.jpg)
.jpg)
Notching progresses as rough hewing is begun with the log still facing up. But the log is rotated after all the notches are knocked out so the bulk of the hewing can be done with a downward stroke of the broad ax.
.jpg)
.jpg)
Hewing and more hewing. Hours pass.
.jpg)
.jpg)
One face is complete and it's time to mark off the adjoining face.
.jpg)
.jpg)
Joinery details are consulted. It's being discussed as to whether all four faces need to be hewn or if only the faces most critical to post and brace joints need to be flattened, the rafter-engaging interior faces thus to be left in the round. These are two must-have books for the traditional framer.
.jpg)
.jpg)
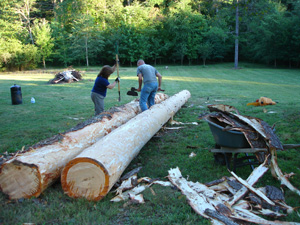
General view of the mayhem. While all this hewing has been going on, I have been principally involved in the de-barking of the second log. There was some conversation over what is the right time of year traditionally reserved for this operation. You see, bark peels easily from summer-cut eastern white pine because the cambial layer is fragile during the growing season. This must be yellow pine.
.jpg)
.jpg)
Some of the implementia. The folding drawknife and hatchet to the right are mine and came into use in the later and even more messy stage of cleaning up the surface after the first peel. Even after the main bark is off there's still allot of stringy mess to get clear for a successful chaukline to be snapped. Shannon reads from a safe distance.
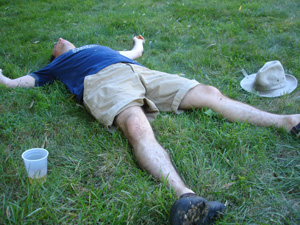
You know what they say: If you're at a timberframing and you can't spot the out of shape city slicker in the first half hour then you are he. This is an unflattering concluding shot, but to document the experience is to show the exhaustion. What has become of of the generations of stalwart laborers that built this great country of ours? They're not sitting behind desks on Peachtree Street. Note shoes caked with pine tar. Note beer.
++++++
And Jayson sent me these pictures (11/10) of some of the subsequent work. They sure got those beams cleaned up and nicely square. Ship shape and Bristol fashion!
.JPG)
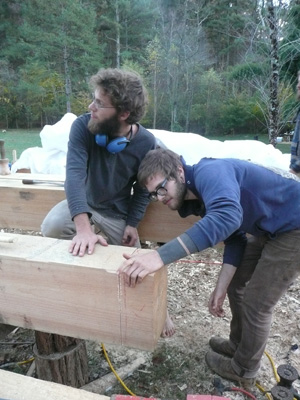
Marking off the shoulders to be made at a tenon, and cleaning up the tenon of what seems like a principal beam.
.JPG)
Cutting the mortise. Looks like we're looking at the bottom of a beam that has a notch made for the post and a further mortise for a tenon (here acting like a peg). And being shaped now is a notch on the side which forms part of a T-in with another beam, creating a sort of complicated half-lap.
++++++

Barn raising day! Shannon and I didn't get to the site until mid afternoon and they already had the sidewalls up and one of the end lintels in place. We saw that the two logs that were hewn the first day are in place as the rafter bearing lintels and only the two faces that mattered for the rafter birdmoth joints were squared.
.jpg)
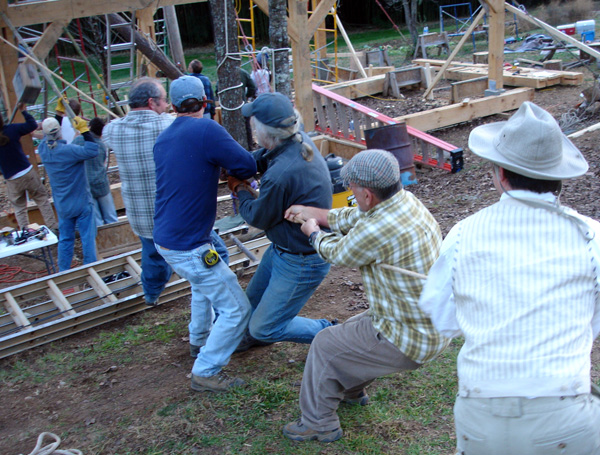
Like all good construction sites. There's one guy working and three standing around watching. This is a big job, so there's four guys working and fourteen standing around watching.
.jpg)
.jpg)
But seriously, you need 20 people for all the lifting and pulling. Here the other end lintel is being raised with a boom that has been erected in the center of the footprint
.jpg)
.jpg)
"The Persuader" is used to seat the lintel on the braces. In the mean time, the canted-out sidewall is held up by a team with bamboo poles (readily available on this site) and, also seen in this shot, pull ropes which are looped around this walls lintel and pulleyed around the opposing lintel, so the team pulling on the canted wall's direction is actually pulling it away from them to close the joint.
.jpg)
.jpg)
Holding up the wall with poles and ropes as the lintel is being seated
With the lintel seated on the braces and aligned with the mortise at the side of the post, the wall can be put back into place with counter-pulling and a little help from the Persuader. Not the best choice for "anchor" here.
.jpg)
Lintel in place. Doing a final tap.
.jpg)
.jpg)
Pegs and braces waiting to be fitted
.jpg)
.jpg)
Arty shot #1. Now that the lintel is in place, pre-drilled splines are slid into pockets through the post and the lintel
.jpg)
.jpg)
Tapping the spline in. In final position the holes will nearly align. Holes are drilled slightly offset so that when the pegs are wedged in they further pull the assembly together
.jpg)
.jpg)
A look at the empty pocket at the opposite end and the brace position. And a better look at the boom. It felt kind of like building a ship.
.jpg)
.jpg)
While all this heavy lifting was going on I was with the much easier-going marking and trimming operation. The bulk of the members for the barn were not hewn on site but milled to order by a local sawmill. But the final trimming to length is done on-site. I'm marking the 9'-6" final length of the upper floor joists.
.jpg)
.jpg)
After the chop, the ends are thicknessed to match the 6" wide pockets that are being mortised at the top of the side lintels. Cleaned up with a rabbet plane.
.jpg)
.jpg)
Stacks of rafters for the gambrel roof, and the plywood template for the marking off,
.jpg)
.jpg)
Cutting the 6" wide upper floor joist pockets. The other end lintel is set in place and the sidewall once again put back into place.
.jpg)
.jpg)
Rigging the sidewall for the counter-pully effort to get the walls squeezed together again
.jpg)
.jpg)
.jpg)
Showing both end lintels in place. The walls will once again be pulled out in the middle for the setting of the center lintel last. I saw that the drawing had progressed since the first day. Now it's in CADD and all the pieces have been identified. But it seemed that some invention was still going on on the day.
.jpg)
.jpg)
This pile looked like it might be gambrel rafters, the notch being a sort of steeply angled scarf joint. And this piece was laid aside for a special purpose and by its shape it looks like a future king post.
.jpg)
Take a moment to enjoy the idyllic setting. Once again, unfortunately, we were not camping, but returning to Atlanta the same day. But there were tents sprinkled around the site. . .and an Airstream!
.jpg)
.jpg)
Bonfire area well established at this point.
.jpg)
A look at the extent of the site rigging, relying on well-placed trees on the site
.jpg)
.jpg)
Arty shot #2. The center lintel is being set as the light fades.
.jpg)
A swarm of grackles or crows was noisy as dusk set in
.jpg)
.jpg)
Generator-powered lighting is brought in as the sun beats the setting of the central lintel
.jpg)
We had a full moon rising - a blue moon at that - as the site was picked up and the bonfire started, and coolers opened.
.jpg)
Comes as sweet and clear as moonlight through the pines. . .I mean bamboo. Actually this is North Carolina, so nevermind.
.jpg)
Having not yet set foot on the John C Campbell Folk School grounds, we decided to check out the contra dance reported to be there that night. But we found we were there a little early. Got to talk to the band though, ramble around a little.
.jpg)
.jpg)
Great spaces that seem like they haven't changed since the 1920's. Except for a few of the furniture choices. You don't have to be an interior designer to spot the elephant in this room.
.jpg)
.jpg)
.jpg)
.jpg)
There's that moon again. And finally, we stopped for dinner in Dahlonega on the way home and found a new pub that had opened in the basement of an old house off the square. What we though was a blues trio turned out to actually be a duo. The guitarist is playing a snare and bass and cymbals with his feet. People with coordination amaze me.
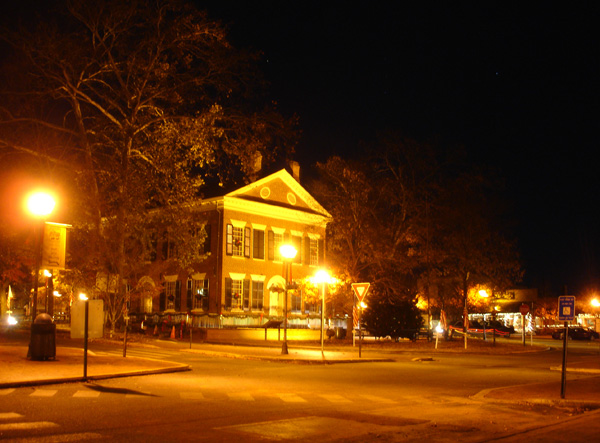
10:30pm on the square in Dahlonega.
I'll continue to add to this page as work on the barn continues. Maybe we'll make it back for another work day
++++++
"Mention of each variety brings to mind some pleasant thoughts connected with the tree, perhaps its beauty as it stands in the forest, a particular quality of its wood, or the recollection of some object formed from it. But to the worker who lives among these trees they signify much more, for in his simple economy each kind fills a special place, and although the catalog of their services is diminishing, it will aid one's appreciation of the trees of the region to consider the various uses of one of them - the shagbark hickory, for instance. . ."
- Allen H. Eaton, from Handicrafts of the Southern Highlands, 1937