![]()
![]()
![]()
![]()
A Symphonia or Chifonie
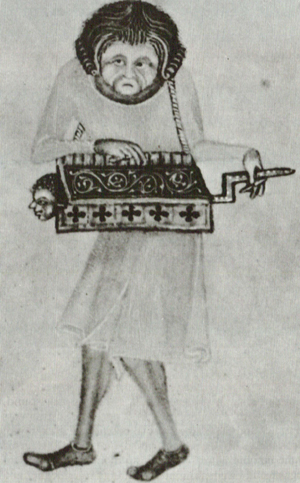
From the Luttrell Psalter, English, 14th c.
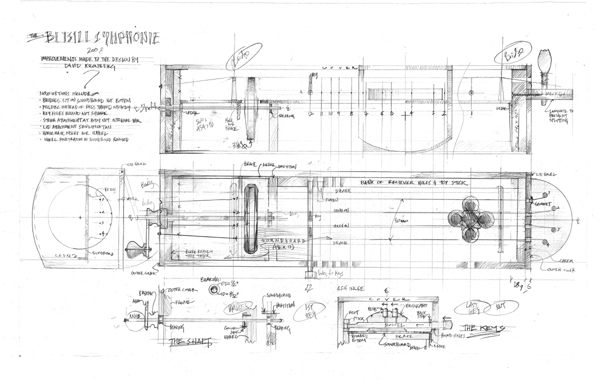
My drawing based on the David Kronberg design. My version has both bridges resting on a common soundboard, a peg disc and the strings extending the full length of the cabinet. I also modified the key design, favoring dowels rather than square sticks.
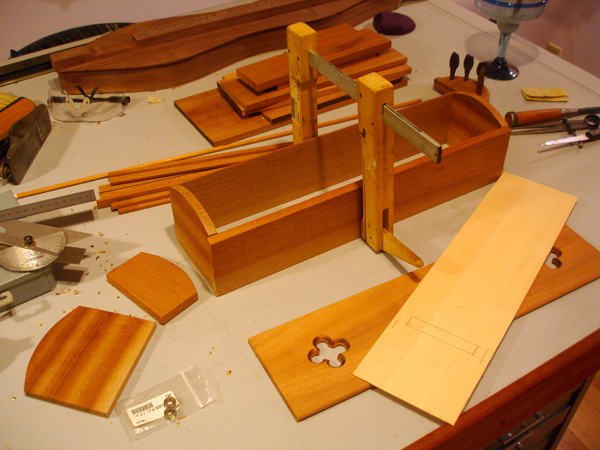
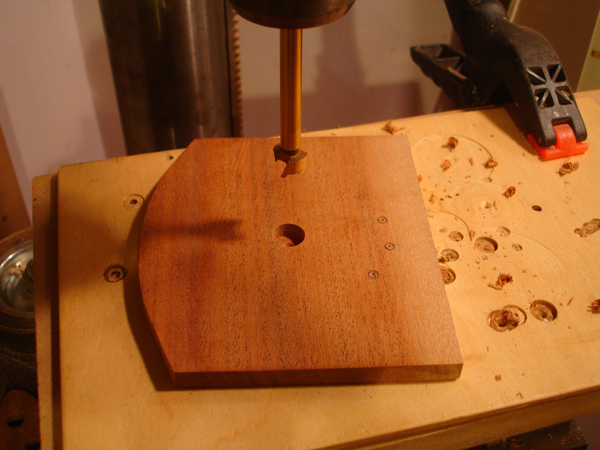
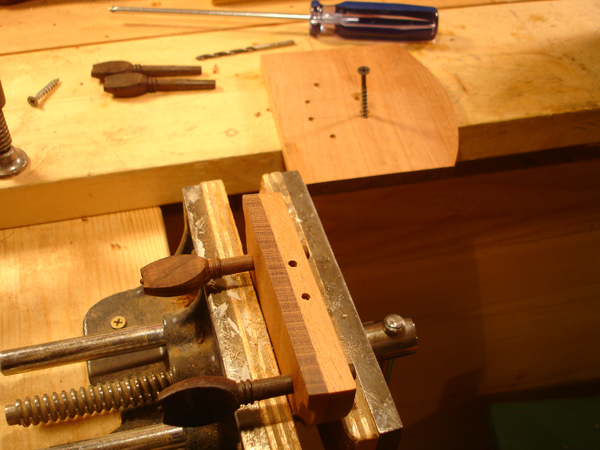
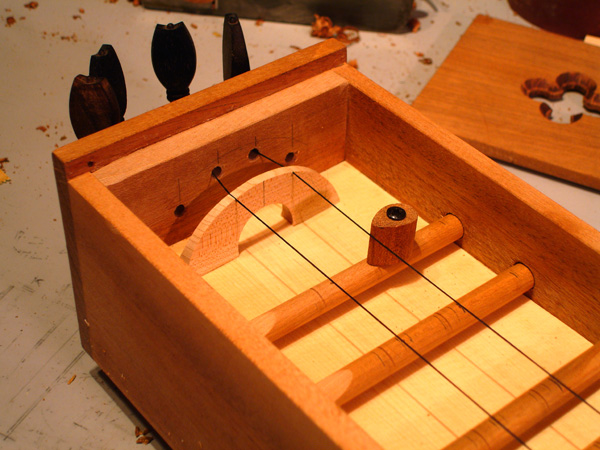
Parts in progress. This is a dry fit of the carriage. The top and soundboard are cut in the foreground. An end cap and the untapped bulkhead for the internal bearing are to the left.
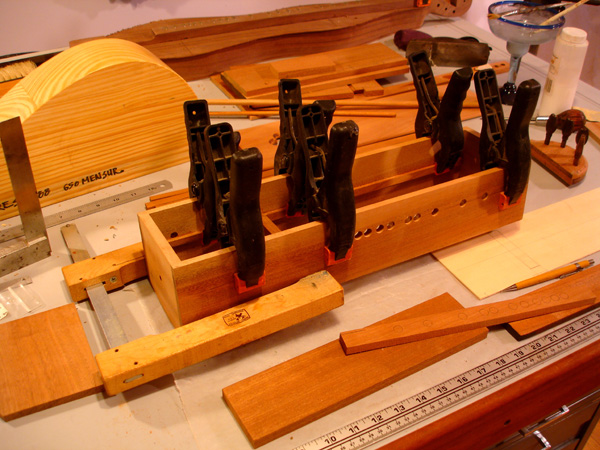
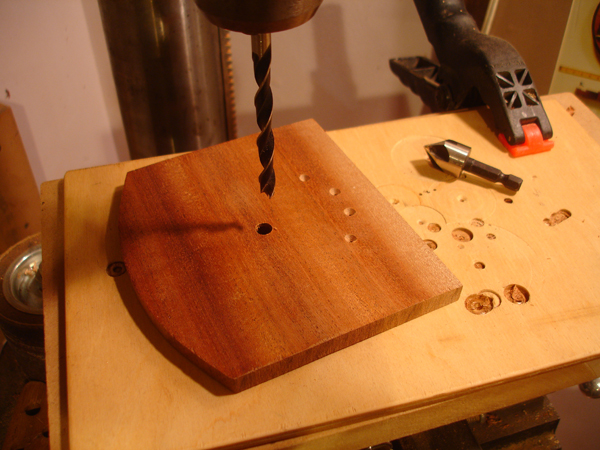
Gluing the soundboard linings to the inside of the carriage. The holes for the keys had to be tapped before assembly.
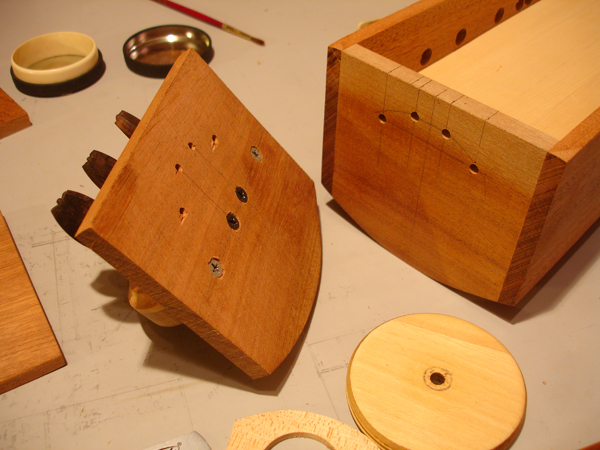
This is my main improvement over the source design. The keys for that instrument were square and therefore required square holes to be tapped into the carriage. Besides square holes being much harder to tap than just drilling out round ones they create a greater splitting potential. The advantage that square holes have is keeping the keys upright. My keys would spin if I didn't flatten the reciver end of the key and create half-holes at the reviever bank.
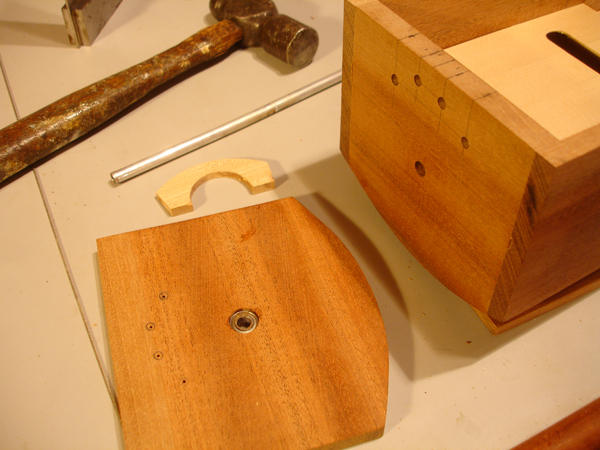
The underside of the soundboard showing the brace locations. Also the key blanks layed out in the reciever.
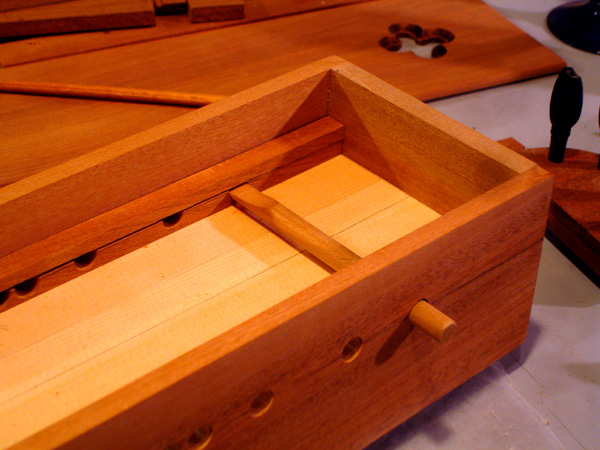
The reciever assembly. With delicate curved termination.

The Kronberg design uses phrenolic for the wheel, which is good for ensuring stability but I can't bring myself to put space-age polymers in a medieval instrument. This is not exactly antique, but at least this plywood is wood, and more stable than solid wood, which no matter how dense is still prone to irregular shrinkage that will affect the consistency of stroke on the strings. This is a precious scrap of 'Paraply', which was available from Home Depot in the 1990's in 4x8 sheets. I used to make modern-looking furniture out of it. The sustainability police has since closed the borders on this stuff. But for what I have left it is the most dense, dimensionally stable plywood I could hope to find. I'm sawing it to thickness here before I turn it on the lathe.
Drilling the bearing seat hole and holes for the strings to pass through the end cap
Flipping it around to drill through the hole for the shaft to pass through and small coves for the knotted ends of strings to set.
The bearing in place, this face will be glued to the end of the carriage. I'm counting on this bearing never needing to be replaced.
A dry fit of the shaft in place through both bearings.
Starting to tap holes for attaching the peg disc to the end cap.
From the land of over-engineering. The peg disc will never ever come off.
Dry fitting the peg assembly end.
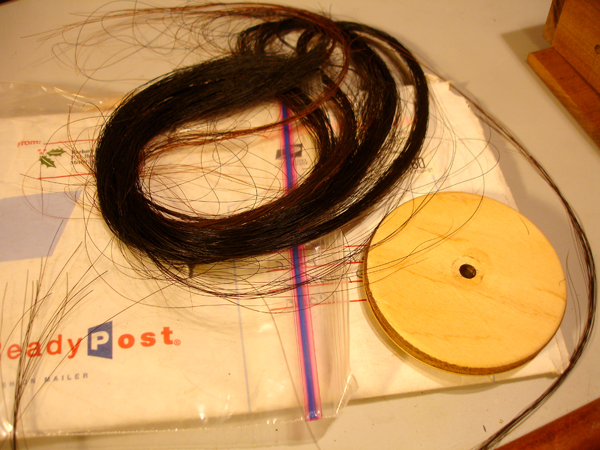
This is hair from my aunt's horse she sent me many years ago for a bow I was going to make. Not quite sure how I'm going to do this.
.jpg)
. . .OK, the horsehair idea proved untennable. Also did the hollow aluminum shaft I got from the local hardware store hobby section. So here is a new wheel that will simply be rosined (in progress on the lathe) and a new solid stainless steel rod that will make a much better. . .
.jpg)
SHAFT! You see this cat Shaft is a bad mother. . .Shut your mouth! . .But I'm talkin' about Shaft. . .Then we can dig it. Right on.
.jpg)
So anyway, stainless steel. . .much better. I've reduced it minutely on the belt sander so it slips into the internal bushing with minimal pounding (having to pound something into place on a musical instrument feels wrong) and creates some tooth for the wheel to grab. I'll probably still have to use a set screw. Here I've put some blocks in place as I tap the shaft through the wheel. It is with this step that I'm realizing the wisdom of the Kronberg design. What it lacks acoustically due to the lower bridge resting not on the soundboard but the back is gain by having the wheel completely accessible after construction. When I put the back on this instrument it will be very hard to ever get the wheel out.
.jpg)
I have to install the wheel somewhat early in the build to make life easier on myself in assembling the staves of the back. With the end caps off I can easily profile the finished stave glue-up on the belt sander and easily trim the ends flush with the carcus.
.jpg)
Kiss that wheel goodbye.
.jpg)
Did they have masking tape in the Middle Ages?
.jpg)
.jpg)
Progress shot of sanding the staves flush with the end and rounding off on the bench sander.
.jpg)
Attaching one of the end caps. It will then be flushed on three edges on the bench sander.
.jpg)
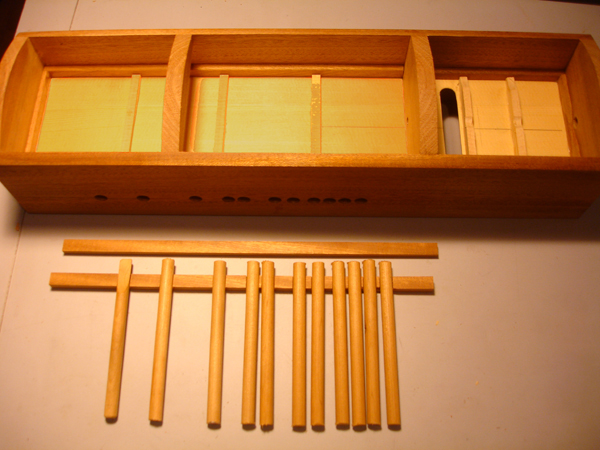
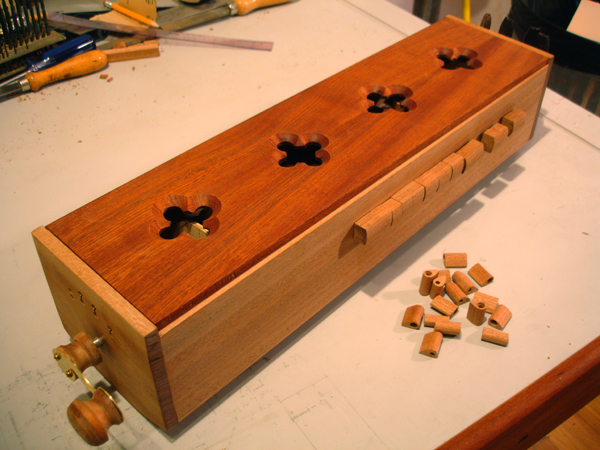
Starting to make the keys. The blank for the keys is drilled out and shaped on the back, then cut to equal lengths.
.jpg)
Don't forget to make sure they're square before the glue sets. i almost did.
.jpg)
Since the keys are different distances apart, the heads will be cut to length individually as each key is matched to a specific reciever.
.jpg)
Each key has its own reviever now and the tips of the shafts are being trimmed to seat the key sung in each slot. Any wobbling will effect the intonation.
.jpg)
After seating each key the heads are trimmed to slip smoothly past one another. The closeness of the heads will also help keep them square upright. I'm compensating for not having those square holes of the original design.
.jpg)
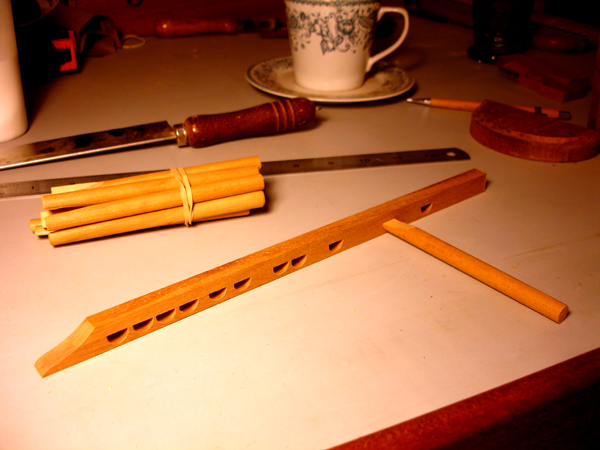
After the heads are trimmed a shim is used to hold them out to the 'open' position while the shafts are marked in three places for holes to be tapped for the stop and the two frets. The first key has set holes tapped for the frets.
Starting to make the frets. Also showing here the simple bridge design
.jpg)
The knob and spacer are turned and I've sketched out the crank arm on brass sheet for cutting out with the jeweler's saw.
.jpg)
Crank temporarily attached. I think it's just going to fit on the shaft end with friction without needing a set screw, but i don't want to tap it into place yet.
.jpg)
Taking a break from fret making, the quadrafoils in the lid get cleaned up with a sanding cone. The router bit I used to shape these wasn't quite sharp so it left burns that I'm sanding out by using a turned cone that matches the router bit angle.
.jpg)
Tedious drilling proceedure: I've made a little rebate seat for the frets to sit in for consistant drilling. The frets get a set hole drilled with a brad point bit. . .
.jpg)
. . .Then get drilled through.
Taking a break from the tedium of fret making to start finishing the case, starting with the lid. This is just a single coat of tung oil. I'll also rub a coat of wax on it. It is questionable whether medieval instruemnts were finished at all, but sapele finishes beautifully with just a basic finish.
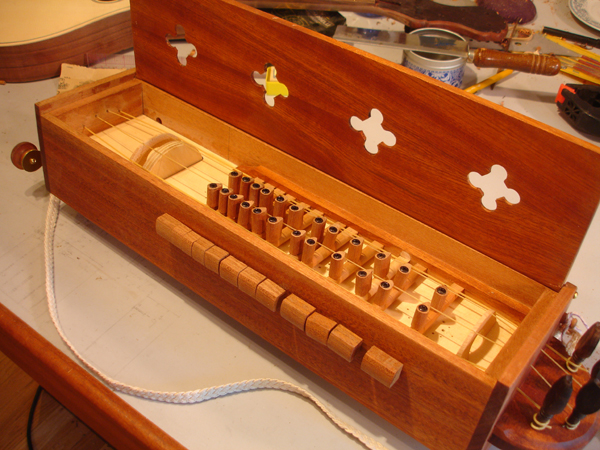
All the tangents are in place. Intonation is adjusted by simply swiveling each of the frets on its tangent.
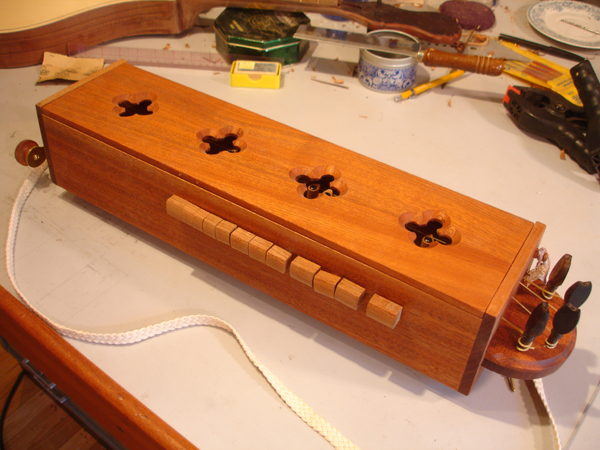
The instrument is complete
++++++